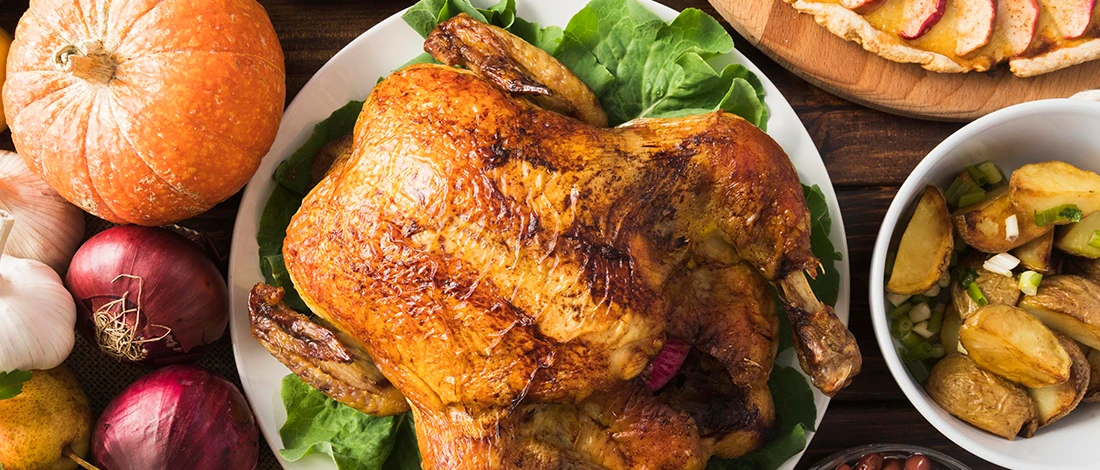
How to Cook Chicken? (4 Cooking Styles & Preparation Tips)
During the ten years I’ve been on a carnivore diet, I’ve tried every possible way of preparing chicken. Roasting, braising, poaching, pan-frying, and grilling are only some of the ways you can cook this poultry to perfection.
Depending on my mood and appetite, I change my cooking methods from time to time, and that allowed me to master each of them.
Here’s what you need to know.
Quick Summary
- Chicken can be prepared and cooked in various ways, including stove-top cooking, roasting, grilling, and boiling, with each method offering a unique flavor and texture.
- Preparation steps include choosing a quality cut, flattening or cutting the meat, and brining or seasoning before cooking.
- Cooking times and temperatures vary by method, but the internal temperature should always reach 165°F for safety.
Preparing Chicken Meat Before Cooking
Getting your chicken right entails preparing the meat before you start cooking.
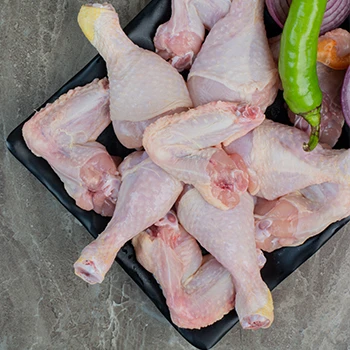
1. Choosing a Cut
Before you learn how to cook chicken, you must know how to choose the best chicken cuts for the most tender and juicy results.
I recommended buying boneless skinless chicken breasts between 6 to 10 oz. If you buy chicken breasts with tenders still attached, it’s harder to flatten the meat because they make it bulky.
Overall, anything larger than 8 oz will be too wide after you flatten it, and you’ll have to cook the breasts in two batches.
Chicken thighs, chicken wings, and drumsticks are other good options. You can also use chicken tenderloin to make chicken fajitas or chicken tenders.
Always look for chicken-grown free-range or organic birds raised in natural surroundings. These birds have much better lives than those grown indoors.
Free-range tends to be more expensive, but it’s worth it because you’ll get better flavor, texture, and meat quality.
Another tip is to choose chicken cuts with opaque skin with no bruising. The flesh should look plump and have a pink color.
If you notice brownish-red “hock burn” on the skin of the legs, it’s a sign the chicken hasn’t been kept in good conditions during growth.
2. Flatten or Cut
After you’ve chosen your cut, it’s time to flatten it. It’s difficult to cook chicken breasts evenly because of their shape — they are thicker on one side and thin out on the other.
You need to flatten the thick side so that the entire boneless chicken breast is level.
Put the boneless skinless chicken breast in a plastic bag, use a mallet or a rolling pin, and pound it. You should have a chicken breast about 1/2 or 3/4 in thick.
Another option is to cut the chicken. You can slice the chicken breast in half horizontally, lengthwise. This works well if your meat is thicker than an inch.
3. Brine and Seasoning
Once you flatten the meat, it’s time to brine or season it. Dry the meat with paper towels on both sides. This removes any extra moisture, so the meat’s surface won’t steam or brown.
Use your preferred seasoning blend and sprinkle the chicken. I use 1/2 teaspoon of seasoning per side, but this can differ in different chicken recipes.
Also, make sure your chicken breast doesn’t sit too long because the salt draws out the moisture to the surface. In case this happens, blot the chicken breast again before cooking.
You can use dry seasonings, such as salt, black pepper, herbs, and garlic powder.
Tip: A little paprika will give your meat a golden hue and a richer taste when you cook it. You can use sweet, smoked, or spicy paprika, depending on your preferences.
“USDA recommends never relying on color, firmness, or time as an indicator to know if your food is fully cooked. Always cook all meats to a minimum safe internal temperature as measured with a food thermometer to prevent foodborne illness.”
- United States Department of Agriculture
If you want to cook chicken breasts in the oven, I recommend brining them first. It makes the chicken breast extra juicy. Fill a bowl with lukewarm water (never with hot). Stir in salt and add the chicken breasts. Let them sit in the saltwater for 15 minutes. Or, you can brine chicken basts in advance and let them sit in the fridge for up to six hours.
Once you’re ready to cook chicken breast, remove it from the brine, rinse with cold water, and pat dry with paper towels.
Note: Some store-bought chicken breasts are pre-brined, so you can skip this step.
After the brine, brush the chicken breast with melted butter for more flavor and a golden crust.
Make sure to brush on both sides so the cooked chicken breast doesn’t stick to the pan.
Tip: Slash the chicken breasts a few times before marinating. This helps the marinade penetrate the meat better.
Related Articles:
- How to Season Meat?
- How Long to Marinate Chicken?
- How to Marinate Meat?
4 Ways to Cook Chicken
Chicken meat yields the best results when you cook it on the stove, but you can also roast, grill, or boil it.
1. On the Stove
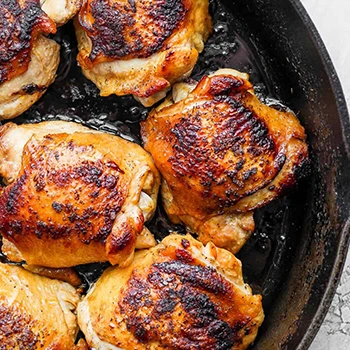
Once you prepare chicken for cooking, it’s time to choose a pan. Go for a cast iron skillet or a stainless steel pan, as these are best for creating a golden-brown crust on chicken breasts. Preheat the pan and heat the oil before you add the chicken breast.
Press down on the chicken breast when you put it in the pan and don’t move the meat for five minutes so it sears well. Once the chicken changes color and develops a crust, it’s time to flip it over.
Add a tablespoon of butter when you flip the chicken and baste the meat. This ensures it doesn’t dry out. You can also add herbs for an aromatic flavor at this step.
Cooked chicken breast should be golden brown and opaque throughout. It’s fine if the juices are slightly pink.
You can use a meat thermometer to check the internal temperature. Make sure to check the thickest part of the chicken breast. The temperature should be between 160 to 165 degrees [1].
Finally, let the meat rest for about five minutes so that the juices redistribute, and then slice.
2. Roasting
Roasting is an excellent cooking method for cooking a whole chicken. I like baking chicken breasts on high heat at 450 degrees for around 15 minutes. The time depends on the size of the chicken breast [2].
Roasting on high heat allows the chicken to develop a crisp crust on the outside, which locks in the juices and keeps the chicken tender on the inside.
Once again, you can use a meat thermometer to check if the temperature is 165 degrees. Don’t cut the juicy chicken with a fork, or the juices will seep out.
You also need to let the chicken rest after you bake it. This finishes the cooking and locks in all the juices, so you have tender and juicy chicken.
Tip: I like to loosely tent a sheet of aluminum foil over the pan of roasted chicken to keep the heat in while it rests.
3. Grilling
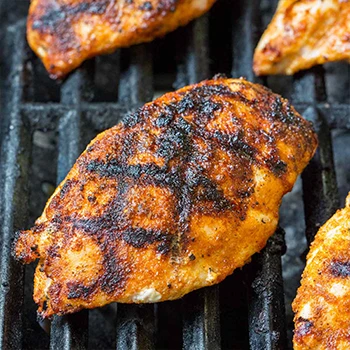
Choose bone-in, skin-on chicken breasts for grilling. Pat them dry and season, and make sure they reach room temperature for even cooking results.
Preheat the grill and create a hot zone for charred and crisp skin and a cool zone for gently cooking the chicken. Your grill should be very hot, around 500 degrees.
Start grilling the chicken skin-side up on the cool side of the grill and cook for 15 minutes. If the chicken starts to burn on the outside, move it to a cold area.
Then flip the chicken with tongs and cook for another 15 minutes, or until the thermometer reads 150 degrees.
You can also baste the chicken with sauce if you like. Finally, finish cooking the chicken on the hot side of the grill for five minutes or until the internal temperature reaches 160 degrees.
Grilled chicken is extremely versatile. You can skewer pieces of chicken thigh or grill a whole chicken breast on the barbecue. Or, use leftover chicken to make kebabs, jerk chicken, and many other dishes.
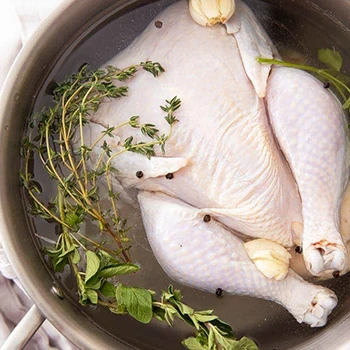
4. Boiling
You must be careful with boiling meat because it can result in some of the most tender chicken you’ve ever tasted or in a chewy slab of meat.
The most important part when poaching chicken is determining the water-to-meat ratio. Use four cups of water if you boil two large chicken breasts.
You should season the water with freshly ground black pepper or other seasonings of your choice. Make sure the water is cold when you add the chicken. It’ll cook this way gradually.
Turn the stove to medium-high heat. Once the water starts to boil, flip the chicken, and remove the pot from the heat. Let it rest for five minutes on the cutting board. Bone and skin the chicken and cut it into cubes.
Tip: You can store the broth and keep it in the fridge for three days.
Tips for Cooking Poultry
Now that we've established how to cook chicken, we can go over other types of poultry and the best ways to prepare it.
1. Duck Breast
Preparation involves scoring the fat without cutting into the meat. Seasoning is added before cooking in a cold pan, where the heat is gradually increased. This method ensures the fat melts effectively, yielding crispy skin and a tender center.
2. Whole Duck
The skin is scored in a diamond pattern, and the fatty parts are poked to allow fat leakage. The duck is seasoned inside and out and roasted for about 3 hours at 350 degrees. The duck should be basted three times during roasting to enhance tenderness.
3. Turkey
Whole turkeys are roasted for about 40 minutes per pound for the initial 6 pounds, with an additional 45 minutes per pound beyond that weight. Given turkey’s mild taste, ample seasoning, herbs, and spices are essential. Basting occasionally and allowing the turkey to rest for about 10 minutes before carving ensures a moist and flavorful result.
4. Goose
The cooking process for goose involves initial roasting followed by slicing off the breast and completing the cooking in a pan. This method ensures crispy skin and tender breast meat. An 8-pound goose typically requires an hour and 40 minutes of cooking time.
Safety and Storage Tips
Proper handling of poultry is crucial. This includes thorough cleaning of the poultry, hands, work surfaces, and utensils. Cooked poultry should be kept warm at about 140°F or stored in the fridge or freezer after 2 hours from cooking to prevent bacterial growth and ensure food safety.
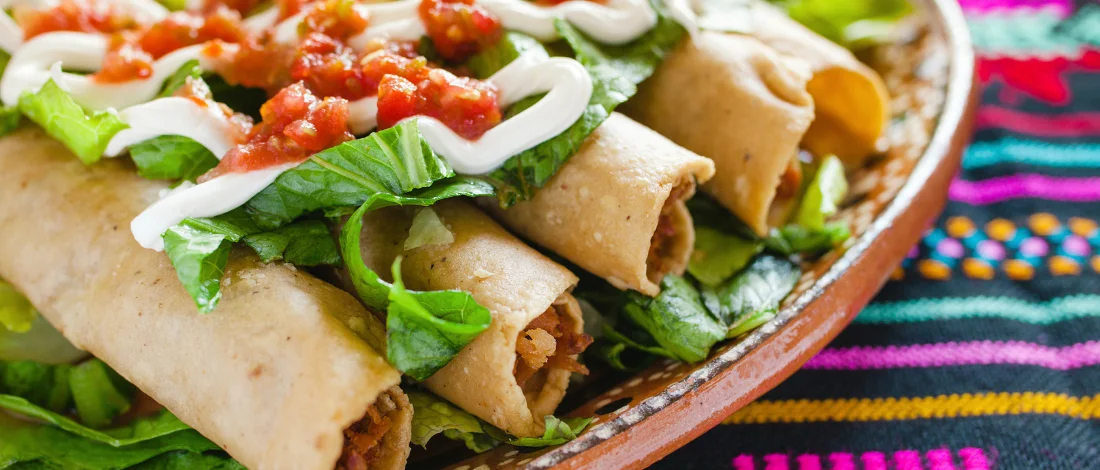
Mexican-Style Chicken Flautas Recipe
- Prep Time: 10 minutes
- Cook Time: 40 minutes
- Total Time: 50 minutes
- Number of Servings: 16 flautas
Ingredients
For the chicken filling:
- 1 1/2 lbs boneless skinless chicken breast
- 1/2 white onion
- 2 Roma tomatoes, diced
- 3 garlic cloves
- 1 bay leaf
- 1 tablespoon salt
For the flautas:
- 12 corn tortillas
- 1 tablespoon oil
- Water, as needed
- Salt and pepper to taste
For serving:
- 1 avocado
- Fresh cilantro
- Mexican crema or sour cream
- Salsa verde or salsa rojo
- Shredded cheese
Instructions
- Put the chicken, cloves, bay leaf, salt, and pepper in a pot. Add water so it completely covers the chicken. Bring the pot to a boil on high heat, then reduce and let it simmer. Cook for about 15 minutes until the chicken reaches 165 degrees. Then, move it to a bowl and let it cool enough to touch. Once the chicken is cool, use forks and shred it.
- Add oil to a small skillet and heat on medium-high heat. Add the tomatoes and onion and cook for five minutes. Stir so the onions don’t burn. Cook until the onion is softened and the tomato is reduced.
- Pour the mixture into the shredded chicken and stir to combine and preheat the oven to 200 degrees.
- Line the baking sheet with paper towels. Wrap a few tortillas (no more than five) in a paper towel and microwave for 10 to 20 seconds so they are soft. Repeat this with all tortillas.
- Put about one tablespoon of shredded chicken on one end of the flour tortillas and roll to make a flauta shape. Secure with a toothpick. Repeat until you use all the tortillas and cooked chicken.
- Add oil to a pot and heat on medium-high heat.
- Add the chicken flautas into the hot oil using tongs. It’s best to add in batches of four to six and fry until they turn golden brown and you have crispy flautas. Flip once or twice to ensure the chicken flautas fry evenly.
- Move the fried flautas to the baking sheet and place them in the oven to keep warm until all the flautas are fried.
- Remove the toothpicks and serve with shredded lettuce, salsa verde, salsa roja, your favorite hot sauce, diced avocados, and cheese.
FAQs
What Is the Best Way to Cook Raw Chicken?
The best way to cook raw chicken is to cook it in a hot pan. This is a quick cooking method that produces delicious results.
How Long Do You Cook Raw Chicken?
How long you cook raw chicken depends on the cut of the chicken and the cooking method. It can range from over two hours for whole chicken and less than 10 minutes for chicken breasts.
What is the Easiest Method of Cooking a Chicken?
The easiest method of cooking a chicken is grilling, frying, and poaching.
References:
- https://www.usda.gov/media/blog/2022/10/03/cooking-meat-it-done-yet
- https://www.chicken.ca/chicken-school/chicken-cooking-times/