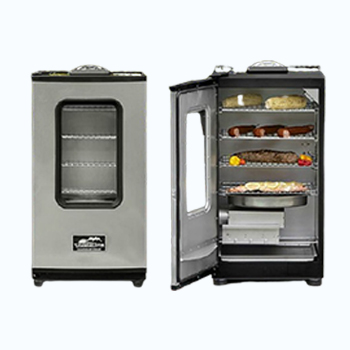
Masterbuilt Smoker Problems (2026 Troubleshooting Guide)
Masterbuilt Smoker is one of the most recognized and praised smokers sold today. Usually, these smokers run smoothly without much trouble.
Although, much like any other product on the market, it's not uncommon to run into concerns and issues along the way.
We've spent considerable time smoking meat on Masterbuilt equipment as part of our carnivore lifestyle, so we've compiled this troubleshooting guide based on real-world experience to help you get the most out of your smoker.
Quick Summary
- Masterbuilt smokers' common problems include temperature control, wood chip loader issues, food not smoking correctly, safety concerns, and cleaning difficulties.
- To keep the right temperature, preseason, preheat, avoid aluminum foil on racks, and don't overload the smoker.
- A 2017 Science Direct study says to cure cold-smoked foods for 6 to 24 hours to several weeks. Hot smoking should last from 4 to 48 hours [1].
- Cleaning should be done promptly to avoid grime build-up.
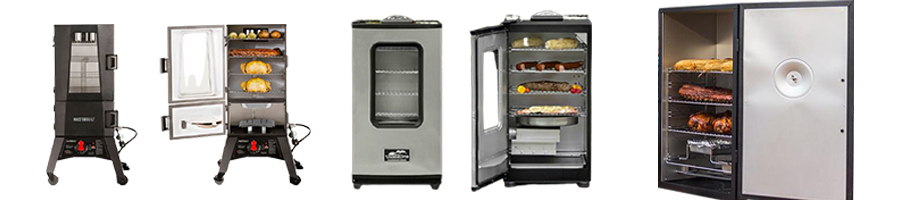
5 Common Masterbuilt Smoker Issues
Whether you're new to the grilling world or you're an OG smoker, running into smoking problems isn't uncommon. Masterbuilt smokers are popular choices for both beginners and experienced pitmasters, but like any equipment, they can develop issues that affect your smoking results.
Below you'll find 5 common issues and troubleshooting tips to tackle all your Masterbuilt problems!
#1 Temperature Issues
New Masterbuilt Smoker owners often face temperature issues. They struggle to find a suitable temperature for their smoker temperature food.
This would result in longer smoke times and constantly having to keep an eye out to the smoke flavor avoid burnt food.
Of course, this isn’t ideal. To ensure you’re smoking your food at the right temperature degrees, check out these temperature settings approved by USDA [2]:
- Fish - 145°F (63°C)
- Pork - 160°F (71°C)
- Lamb, Steaks, Veal or Beef 145°F (63°C)
- Ground Beef, Veal or Lamb 160°F (71°C)
- Pork - 160°F (71°C)
- Egg Dishes - 160°F (71°C)
- Ground or Poultry Pieces 165°F (74°C)
- Whole Poultry (Turkey, Chicken, Duck, etc.) 165°F (74°C)
If you want to avoid unsmoked or burning food, remember the following:
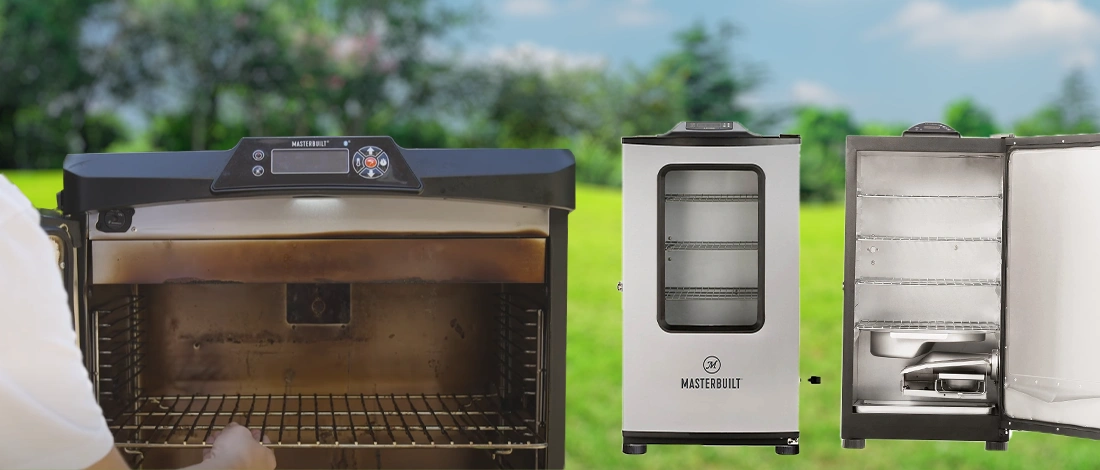
- On a brand spanking new electric smoker, it’s pretty important to “preseason” before first use. Doing so will get rid of manufacturing dust, oils, and dirt. You can check out our guide on how to season an electric smoker for detailed instructions.
- Give yourself a good amount of time to cook your food. The Masterbuilt Electric Smoker is generally considered a slow smoker - rushing won't get you the results you want.
- Preheat your Masterbuilt Electric Smoker at its maximum temperature setting for around 30 - 45 minutes before you load in the food.
- Covering the racks with aluminum foil may speed up cleaning time, but it significantly slows down cooking. The aluminum foil only blocks the heating element from doing its job properly.
- Don’t overdo it with your dinner. The Masterbuilt Electric Smoker can only hold so much, and overloading it can trap the heat and lengthen your cooking time. It may even result in uneven cooking.
- The control panel's temperature reading may fluctuate 10 to 15 degrees as the electric smoke cycles on and off.
Follow these tips and tricks for better temperature control when cooking:
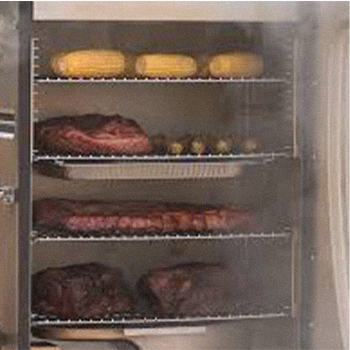
- Make sure to leave enough space between the sides of the electric smoker and the items on the racks. This will ensure proper heat circulation and smoke. If you’re using cooking pans, place the pan on the center of the rack to ensure even cooking.
- Don’t overload your Masterbuilt Electric Smoker. See the loading capacity of your electric smoker and only accommodate the food load it suggests. Too much food inside your smoker can obstruct the heating element and racks.
- Close the air damper on top of your Masterbuilt Electric Smoker to keep in the moisture and heat. Only open the air damper if you’re cooking foods such as fish or jerky.
- When you add more wood chips, the temperature of your smoker may spike briefly. But don’t adjust the temp, as it’ll stabilize within a minute or two. Feel free to check our guide on how to regulate temperature in a smoker to learn more great tips and tricks.
#2 Wood Chip Loader Issues
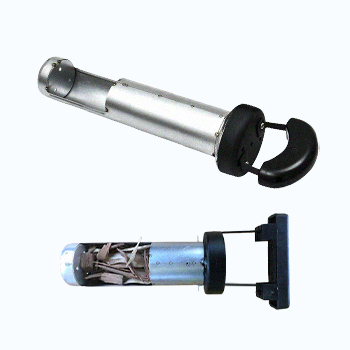
Some customers report issues with their electric smokers wood chip loader. Others may be unaware of what types of wood chips to use that will spice up their dinner in the right way.
See the correct way to load wood chips into your electric smoker so you don’t run into any issues:
Step 1: You can either pre-soak your wood chips in water for around 30 minutes or place them in your smoker dry. Dry chips will produce more intense smoke and burn faster.
Step 2: Add 1 cup of your chosen wood chips inside your Masterbuilt Electric Smoker before starting. Avoid using more than 1 cup of wood pellets or chips at the same time and don’t use wood chunks.
Step 3: Place the wood chip tray and loader inside the smoker.
Step 4: Switch the handle to the “unload” setting so the chips drop into the unit's wood chip bag holder.
Then, turn the handle to the “load” setting. You can leave the smoker’s wood chip loader inside and replace the Masterbuilt Electric Smoker.
Step 5: To make sure your wood chips aren’t burnt to a crisp, it’s a good idea to keep an eye on the temperature probe the way your chips are burning.
You can remove the smoker’s lid and chip loader and look through the smokers' hole. If more chips are required, simply add more.
Step 6: While you’re smoking your meat, you can add in more wood as needed. Just make sure the smokers' door is closed when adding more wood.
It would be good to remember that even though the handle is not hot, the wood chip loader will be!
There are many types of wood out there, and all the choices can be a little confusing.
To give you a better idea, the following woods are recommended:
- Pork: Hickory, Pecan, Maple, Cherry, Apple, Alder
- Fish: Hickory, Pecan, Apple, Alder
- Poultry: Hickory, Pecan, Apple, Cherry, Maple, Alder, Mesquite
- Lamb: Mesquite
- Ham: Hickory [3]
If you want to avoid common problems with your wood chip loader, check out the following tips:
- The wood should reach the top of the rim of your wood chip loader to avoid constantly loading the tray.
- If the wood ends up becoming stuck or overloaded, make sure you pull out the wood chip loader completely from the unit. Check to see if the level of the chip holder and remove it if necessary.
"You don't need a silver fork to eat good food."
- Paul Prudhomme, American Chef
Recommended Article: How to Use Wood Chips in an Electric Smoker
#3 Food Not Smoking Correctly

If you’re finding it difficult to smoke your meat, take a look at these troubleshooting tips:
- As stated before, the electric Masterbuilt smoker is considered a slow smoke burner. You’ll need to pre-heat the smoker to 250 degrees before you get optimal use of your smoker.
- When you put your meat in the smoker, you need to have it placed in the right position. Keep the damper closed and burn it at a constant temp. This way the food will cook all the way through and won't burn at the edges.
-
Due to weather changes, outdoor cooking can become a struggle. If it’s cold outside, avoid opening the smokers' door. If you do so, you can alter the temp inside the smoker. As a result, it’ll take more time to burn. If it’s raining, you can purchase a plastic waterproof cover to protect your smoker.
#4 Safety Issues
When dealing with electrical appliances, especially for the first time, they’ll always be questions and concerns. In this instance, you may have a problem or two with the safety of your smoker.
Check out these troubleshooting tips:
- Do not attempt to move your smoker while using it. If you need to change where your smoker is placed, make sure it has completely cooled down before moving or storing.
- Take extra care when removing food from the electric smoker. It is a common problem for people to forget just how hot the surfaces get and they end up burning themselves. Wear protective gloves when removing your food.
- Covering the cooking racks with tinfoil will not only trap the heat but may severely damage your smoker.
#5 Cleaning Issues

Cleaning your smoker is a tedious task, to say the least. One top fire cleaning troubleshooting tip is to clean your smoker as soon as it has cooled down.
This will stop oils and grime from hardening and sticking, in turn, making cleaning far more difficult than it has to be.
Check out the right way for cleaning your Masterbuilt Smoker:
- For the drip tray and cooking racks, you can use mild dish soap and water. Rince the items properly and ensure they dry thoroughly.
- Clean your wood chip loader and holder often to avoid dust, ash, and charcoal residue build-up.
- For the interior parts of a Masterbuilt Smoker, such as the meat probe, light cover, and glass door, simply wiping them with a damp cloth will suffice. The same goes for the exterior parts. Avoid using a cleaning agent and dry all the parts well.
- You should also clean the inside seam and door seal after every use to keep the seal in maximum working condition.
- Always assure the smoker is turned off and cooled down prior to cleaning.
Extra Cleaning Tips:
- Never use harsh cleaning materials such as wire sponges to clean your electric smoker. Doing so will only scratch and damage the smoker.
- Avoid putting oil on your burner regularly. Using oil on your burner one time in three months will be enough.
Recommended Article: Best Way to Season a Masterbuilt Propane Smoker
Additional Masterbuilt Electric Smoker Troubleshooting
Power light not turning on:
Cause:
- Tripping the house fuse
- Not plugged into the wall properly
- Wire not directly connected to the smoker
Solution:
- Double-check the connections
- Check the household fuse
Electrical smoker leaking grease:
Cause:
- The build-up of excessive oils and grease
- The drip pan is not properly in place
Solution:
- Give your electric smoker model a good clean
- Make sure the drip pan lines up correctly with the bottom of the unit drain.
Heating takes longer than usual (more than 70 minutes):
Cause:
- The door is slightly open
- The electric smoker is plugged into an extension cord
Solution:
- Ensure the door isn't open and securely fasten the latch
- Use a direct wall outlet
Electric smoker not producing smoke:
Cause:
- Not enough wood chips
Solution:
- Load the smoker with more wood chips
Temperature doesn’t stay consistent or decreases rapidly:
Cause:
- Faulty smoker or broken heater element
Solution:
- Contact Masterbuilt for assistance
FAQs
Where do I get replacement parts for my Masterbuilt Smoker?
Visit the official Masterbuilt website and you’ll be able to find what you need for your model under the “Parts” page [2].
References:
- https://www.sciencedirect.com/topics/food-science/food-smoking
- https://www.fsis.usda.gov/food-safety/safe-food-handling-and-preparation/food-safety-basics/safe-temperature-chart
- https://www.chargriller.com/blogs/tips-and-care/your-guide-to-wood-chips